Mercury Help: How to Create a News Article, Story, or Event
Primary tabs
Remember, you cannot push content into someone else’s feed. The web team recommends creating media items (images, videos) in Mercury before creating any articles that use said media.
- Prerequisites: You will need to be a member of the Mercury group that you want to create content for.
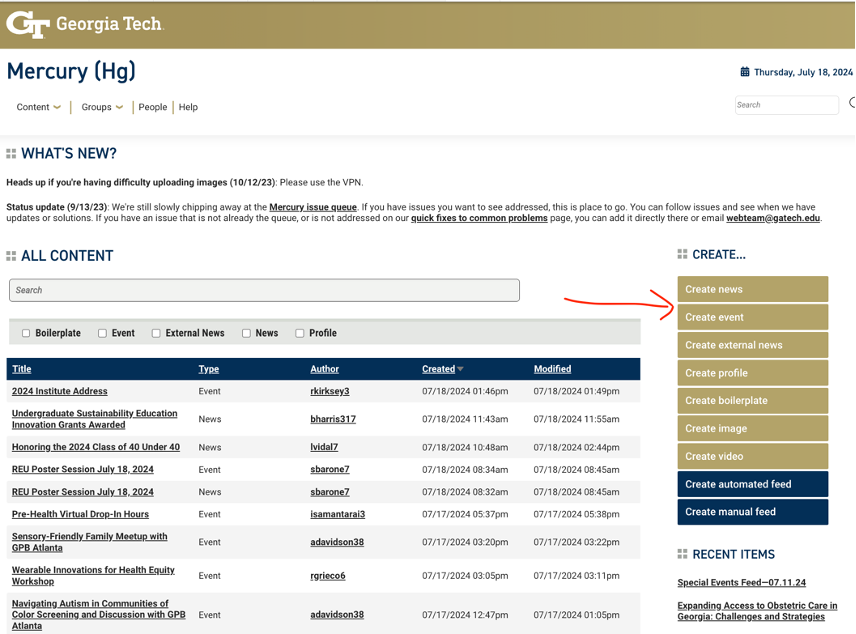
- Begin by logging into the Mercury site (hg.gatech.edu) and selecting either “Create Image” or “Create Video” from the gold links in the right-hand toolbar.

3. Fill out the form:
- Give the image a name.
- Upload the image. Once you have uploaded it, a field will appear for alternate text. This is required for screen readers and other accessibility devices.
- You may choose to add a description, category, or keywords.
- Select the group that this media is relevant to. You can add multiple groups.
- Choose if you would like the item to be published or a draft. Please note that draft media items will not appear in published articles. For the media to show up, select “Published.”
4. Click “Save.” Once you are back to the main Hg page, select the type of content you want to create from the gold links on the right, such as “Create News.”
5. Fill out the form:
- The title will be the public name of the piece displayed on the site. Important: Please note that the title is also how Mercury creates the url. That means changing the title after publication can result in broken links. Please DO NOT change the title after publishing.
- You may choose to give the piece a subtitle.
- Give the piece a summary sentence. In the default Mercury Reader block display, this sentence is displayed under the title as a teaser, so please do not simply copy-paste the title into this field.
- Give the piece a summary of up to one paragraph in length.
- Give the piece a date. Similar to the title, the date is included in the url. Therefore, please DO NOT change the date after publishing.
- Paste in the body. You may use text markups like bold and italics using the tools in this text field. The web team recommends formatting in this text field, rather than pasting in formatting.
- Add the relevant media.
- Select the relevant categories and keywords.
- Fill in any other relevant sections.
- In the “Groups” field, select the groups that should have the ability to edit the content.
- Set the content to “Published” for it to show up.
6. Click “Save.”